
How to use highlights to your advantage to add interest to your photos
This is slightly more forgiving when using a DSLR camera, but even with those there is a certain point where if a detail is blown out, you cannot get it back. If something shows up too bright in your image, you will not be able to fix it, even if you have access to an editing tool. For that reason, you have to be really careful when it comes to HIGHLIGHTS.
Those happen when a light or the sun is creating brighter areas, while other parts of the scene you are photographing are darker. For example, when the sun shines between the leaves of a tree, not giving you a completely shaded area. Or when direct light coming from a window makes an area of your room really bright and you can see the transition from the harsh window light to ambient light. Or maybe someone sitting directly under a light later in the day when everything else is dark around.
The best way to avoid this is to tap on the brightest area you are photographing on your phone screen or trying to focus on it using your camera (in auto mode, it might be a bit harder to achieve, you might want to try to adjust your meter down so it underexposes, but I will go over that at a later time).
Another great way to avoid that from happening is to avoid it all together. If I see a “hot spot” on someone’s head, I will just get them to move over slightly until I have an even light.
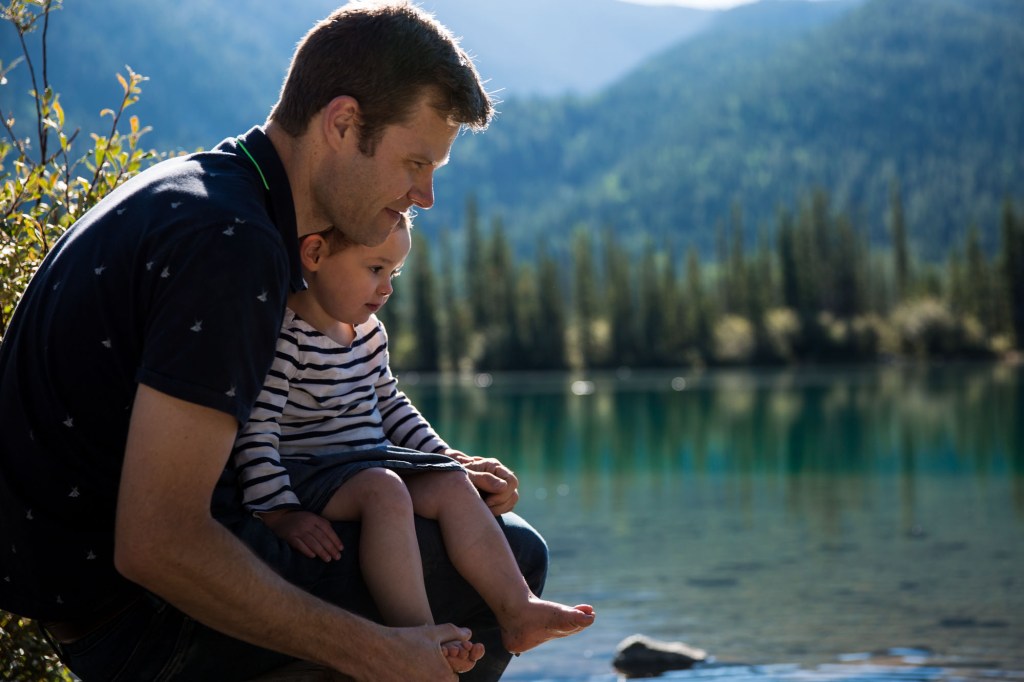
You can also use this to your advantage by really putting the focus on a specific area that is brightly lit up and keeping everything else too dark to really discern it. You can achieve some really creative effects that way, which is what I have done in the image above.

All about the white balance and the different colours of light
Not all light is the same colour. The spectrum goes from yellow (warm tones) to blue (cool tones) and the hue also changes from green to pink. Cell phones and cameras in auto mode do a pretty good job at adjusting for those on their own but it is nice to understand how it all works. Light temperature is measured in Kelvin.
Sunrise and sunset are warmer (more yellow) – 3000 to 4000K
Sunlight and flash are around 5500K
A cloudy sky or shade is a cooler light (more blue) – Up to 8000K
As your device adjusts for the right WHITE BALANCE, it will try to make your photo look as neutral as possible, which works well. But what if you could take advantage of those tones? I love keeping a golden sunset warmer. I like warming up a photo I take in the shade or after the sun sets when the light is more blue, but I also like keeping those images a big moodier sometimes. I like having the flexibility to adjust the white balance.
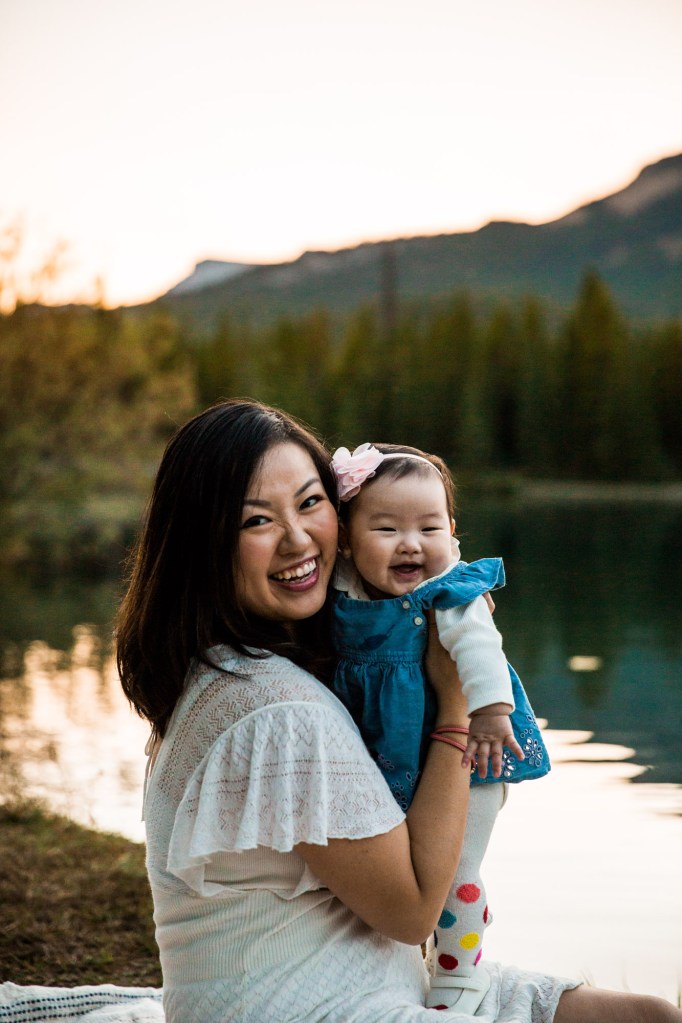
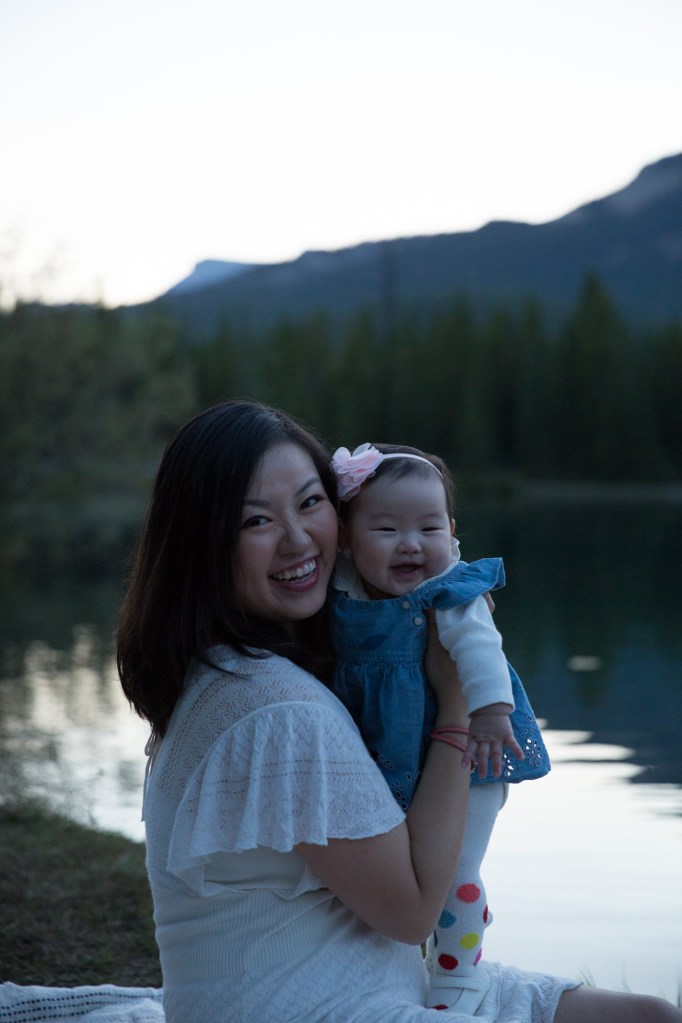
The picture above is what I feel is the best white balance for this image. Bellow, I have included a version that is cooler (more blue) and a version with a warmer tone (more yellow). The blue makes the water even more teal, but the faces loose their warmth. The warmer tone makes the sunlight more golden but you loose the teal colour of the water. It’s all about finding the right balance. And it’s all a bit subjective.
If you play with your editing tools on your phone, you will find one that allows you to adjust that a little. Unfortunately, you cannot truly adjust the white balance on a Jpeg file. Once the picture is taken, you are pretty much stuck with that tone. But technology nowadays is amazing and the white balance on your images should be pretty accurate, you just don’t get to play with it as much. Which is why RAW files are so amazing, and that is what I will talk about next.


What is the difference between RAW files and Jpeg files
When you upload your pictures from your device to your computer, the file name ends in .jpg
Jpegs are convenient because they can go right from your device to your social media page or to the print lab. You can apply some basic edits using your phone (but it might reduce the quality of the image).
RAW (.CR2) files on the other hand, need additional work. The biggest advantage to shooting RAW is that the files are huge and retain so much information from the scene at the time that the photo was taken. It allows you to capture all of the tones and colours. So if you have a photo that is too dark, you can brighten it up. If your photo is too bright, you can make it darker, as long as the details in the highlights weren’t blown out (see my post on highlights from two weeks ago). You can brighten up the colours, bring back details, enhance specific areas, soften others, make things disappear from the background, you can change the white balance (view my post from last week), you can put your own touch and style on the photo because of the massive size of the file (about 30 Mb vs 1-8Mb for most Jpeg, depending on the size that your device is set to save the files).
DSLR’s can be set to shoot with both at the same time, so if you have one and have been shooting with Jpegs, my advice is to go to your settings and start using both types of files (you will need a bigger memory card). That way, if you are not ready to start editing or don’t have the time, you will have the quick and easy Jpegs. But if you take a photo you really love and decide that you want to enhance it, you will be able to do that too. Some programs like Lightroom are very affordable and even if you don’t go to the lengths that photographers do in your editing process, you can sharpen the images. They are not pre-sharpened like a Jpeg. And if you don’t own or want to buy a big expensive camera, some higher end point and shoots now offer the RAW option.
What is the middle gray in photography and what to watch out for when photographing black or white scenes
When shooting in auto mode, your camera uses a meter to calculate the amount of light it needs to let in to properly expose the photo. It will figure out the ideal setting so that your photo isn’t too dark or too bright. Your camera will do that by calculating the MIDDLE GRAY. It works really well in most cases, but your camera will get tricked if what you are photographing is either too white or too black. If there are enough other colours around, it should be able to figure it out. But if everything is black, it will try to bring it back to gray by adding light to make it a lighter tone. Your image will be too bright and your blacks will loose their depth. On the other hand, if everything is white, it will think that the scene is really lit up and will try to darken it to make it more gray. Your image will come out too dark.
The best example of this is taking a photo outside on a snowy day. When I first started taking pictures in the Rockies, I didn’t know anything about photography. I tried taking pictures of the mountains in the winter and the pretty white snow came out all gray. You would also encounter that issue if white flowers, a white dress, a black suit or a black dog take up a lot of the frame.
The best way to fight this with a phone is by tapping on whichever area has colour on your screen to force the photo to focus on that and use that to adjust the exposure. With a camera, even a point and shoot, you need to adjust your meter. It’s the line that goes -2 — -1 — 0 — 1 — 2
If everything is black go minus 1 or 2 to make it darker and get your really nice blacks instead of a flat gray.
If everything is white, go plus 1 or 2 so your whites are nice and crisp, not gray.
This may or may not make sense right now, but as you experiment with it, you will start to understand how it works a lot better. And feel free to send your questions my way, I’ll be happy to answer them!

How to create a specific mood for your image to convey an emotion, tell a story
Do you want the photo to feel intimate, romantic, sweet, vibrant, fun, playful of maybe even sad? You can alter the MOOD of your photo, both while taking the image and while editing it.
While taking the photo, pay attention to the time of the day, the lighting and the outfits that your subjects wear. If you take a photo in the morning or mid-day, the colours will be really vibrant and bright. Your photo will be more playful, joyful. If you take a photo at golden hour, when the light is dreamy, it will make your photo sweet or romantic. If the sky is cloudy or you are shooting before sunrise or after sunset, the tone will be blue and dark. That kind of tone might help you portray an intimate moment. Or maybe if you are trying to capture sadness or anger, you can use that lighting to your advantage. You are not locked in a specific mood when shooting in one specific type of lighting, but it is a starting point. The colour of the clothing and the emotion on people’s faces will dictate the mood of your image just as much – dark, light, colourful, big smiles, serious faces, intimate stares into each other’s eyes, you know what I’m getting at!
Then comes the editing style. With Instagram filters, apps and basic edits on your phone, you can easily edit your photos to change the mood. You can change the tone. How warm or cool do you want the photo? How dark do you want your shadows or how much contrast do you want to add? Generally speaking, bright and airy tones or more saturated colours will look happy and fun, darker shadows and more contrast will look more intimate.
And this is so subjective. Every viewer will perceive the image differently. And as you practice more, you start shooting with intent. You look at a scene and you already know what type of image you are trying to create. You are not simply taking a photo anymore, you are crafting a keepsake and telling a story.

When to use black and white photography
BLACK AND WHITE photography is timeless and can turn a photograph into fine art. But to let you in on a little secret, sometimes I use black and white because I want to, sometimes because I have to. Here’s why.
Black and white has the potential to create a more dramatic effect by putting the emphasis on the lighting, shadows and contrast. It is great when the light, form and texture is more appealing than the colours, or if colour is a distraction. It helps show strong emotions and really focus on the subject. I love using it when people have bright blue eyes (like in this photo) because although the colour is gone, you can absolutely tell how beautiful their big blue eyes are, and I feel like you can see right into their soul.
And sometimes, I turn a photo black and white because there is absolutely nothing I can do to fix the colours. That will happen if a vibrant colour completely takes over the image, if the clothes, green grass or the paint colour on the wall reflects on someone’s skin and affects the skin tone to the point where it cannot be properly adjusted. Or if there are two different colours of light in the same scene and you would need two different white balances in the same image. For example, natural window light is blueish white and tungsten light, like the ones most people have in their homes, is a lot yellower. Which is why I typically ask people to turn off all of the lights in the house if we have an indoor shoot during the day time. It is much easier to achieve the desired tone this way. But if it really doesn’t work out, black and white is your best friend.
